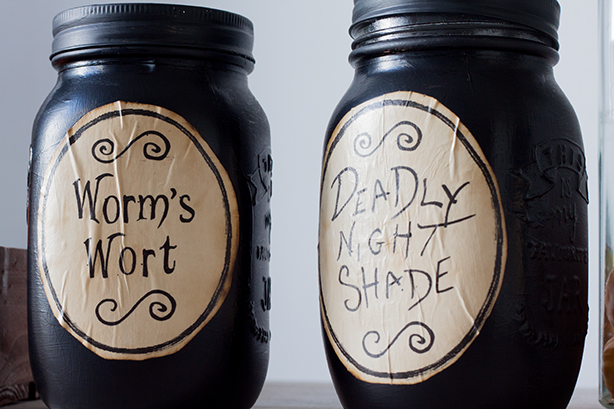
I’ve been searching local stores and online party supplies for classic and tasteful Halloween decor. Let me say it’s been a struggle. There’s so much more to Halloween than gore and rave parties. But unfortunately that’s all I’ve been able to find where I live in North Holland. So I decided to take matters into my own hands. These Nightmare Before Christmas Inspired Jars were so fun and easy to make. I couldn’t help but share how I did it.
First, if you want to make these at home, make sure your printer’s ink will not run in water. It’s game over if it does. Now we don’t have Targets here (oh the horror!) and that meant that Sander and I had to visit several stores before we could find mason jars. A regular old mason jar was a struggle to find! I was able to find most of what I needed at a single store so getting these supplies shouldn’t be difficult. As for the printables, I’m using Halloween Party Apothecary Labels and Nightmare Before Christmas Labels. While you can use any glue finish you want, I recommend Matte.
What you will need:
- Black acrylic paint
- Paint Brush
- Craft glue (I swear by Mod Podge)
- Printable designs of your choice
- Printer with waterproof ink
- Black Tea bags (The stronger the better)
Step 1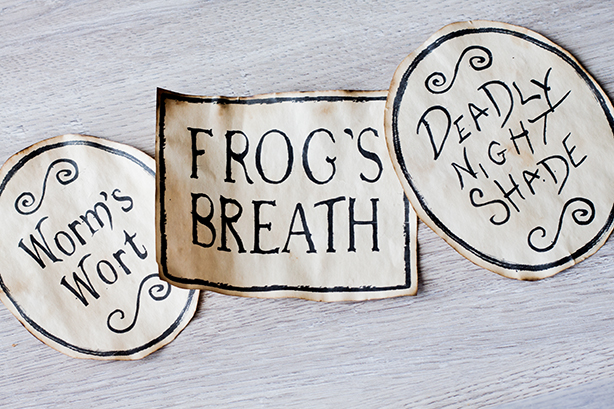
We gotta age those labels! Now I did the first batch to test how both the paper and staining would react and it was magical. How to get your paper so old and yellowed, you ask? By using tea! I’ve known this trick for so long that I cannot tell you where I got it. I will share though, because I loved the final result.
First brew a strong cup of tea and allow it to cool. After you’ve cut out your design, place the label into the brew and allow it to soak. Now I was worried that soaking it would result in the ink washing off so I did 7 baths until the paper “aged” to my liking. It’s important to allow the dyed label to dry completely before dipping again. This way the color can build well and you won’t rip the paper while trying to pick it up.
Step 2
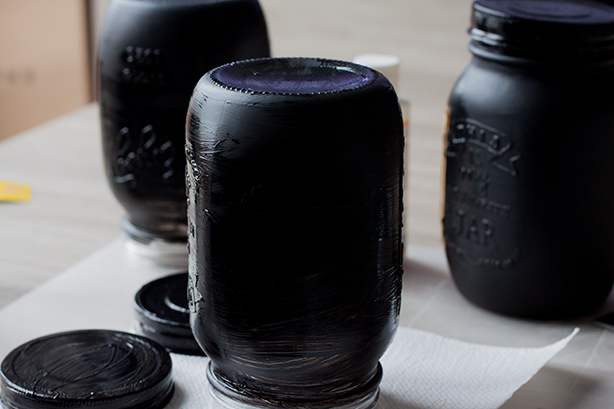
Now that your label is aged to perfection (lol) it’s time to paint your bottles. I used regular black acrylic paint and coated each bottle 3 times so that it was completely opaque. It’s fine for the first layer to be a bit transparent and unfinished. The base is what helps add to the color and deepen it to a delicious black.
Step 3
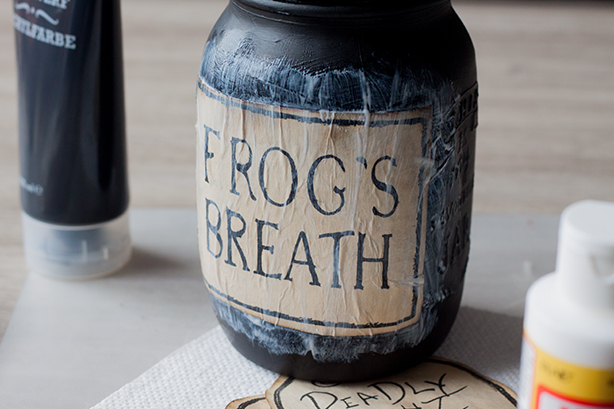 Apply the labels. I placed down a generous amount of glue before I placed the label over it. After that I spread glue all along the edges and corners of the label so that it wouldn’t peel off.
As you can see, the glue has a different dry finish than the paint does. Coat the entire jar in glue so that the finish is the same. Do this in sections though, you don’t want to let your jar dry and have it stick to anything under it…
And you’re done! Admire your Nightmare Before Christmas Inspired Jars! Feel free to place them all over the place!
If you decide to make these, I would love to see how they turned out!
3 Comments
saradiz
October 20, 2017 at 8:17 amLove the DIY! xx
Minimal Halloween Decor – A Daily Lee
October 26, 2017 at 5:25 pm[…] bought. I put together a Halloween mood board that included candles, pumpkins and of course those beautiful jars that I made a few weeks ago. The end result was what you see […]
Our Minimal Halloween Decor 2018 - A Daily Lee
October 10, 2018 at 5:37 pm[…] main decorations, those fun Nightmare Before Christmas Jars are from last year. We also have a ton of tiny pumpkins that I like to put in a vase too. This year […]